TerminalSixel + Kitty graphics, Kitty fonts and shaping, animated cursor, TUI-aware touch
DOCUMENTATION
Quick Start
Termux Launcher is a terminal emulator Android home launcher, powered by the amazing Termux terminal emulator. It is designed to give you the closest experience to controlling your Android using a terminal.
The shell underneath is still upstream Termux — pkg, the repositories and everything you already know keep working. Everything above the shell has diverged far enough to be its own thing now. If you’re familiar with Termux already, the feature list below plus the linked pages is all you need.
src: assets/showcase/raw/hero
title: Home screen tour
formats: mp4
caption: The home screen - status strip, live terminal, app dock, A-Z row and the built-in keyboard.
What’s added on top of Termux
- Terminal features — Sixel + Kitty graphics protocols (images and gifs right in the terminal), kitty font handling and shaping, kitty keyboard protocol, styled underlines, animated cursor, TUI-aware touch. Details on Terminal.
- In-app multiplexer — like tmux but with some clear advantages, such as pinch zoom per pane. Sessions, windows, panes, floating panes and a scratchpad.
Ctrl+Altis the default chord — hold it and the bound keys light up with a legend. See Terminal and Keybindings. - Command palette — swipe up on the space bar or
Ctrl+Alt+Shift+P. Launch Android apps and reach every launcher feature from one search box. See Command Palette. - In-app keyboard — a built-in port of Unexpected Keyboard by Julow. See in-app keyboard.
- Status bar — session chip, window pills, RAM, best-effort CPU and weather; Shizuku adds detailed CPU/memory and process data. Tap a status item for a drop-down with more info, slide down for the expanded clock, and swipe up to close it. Essential notification rules pin the notifications you wait for above the prompt.
- Quick reply — answer a pinned app’s notification without leaving the terminal. See Home Launcher.
- App drawer + dock — A-Z row launching, a full drawer with three layouts, folders, custom icons. See Home Launcher.
- Material color themes — the whole UI, terminal and keyboard follow your wallpaper.
- Local LLM backends — Google LiteRT and Alibaba MNN, served over OpenAI/Ollama-compatible endpoints. See LLM backends.
Editions
There are 2 editions (and a legacy one deprecated) of Termux Launcher available;
| Editions | Android package | Notes |
|---|---|---|
| (Recommended) Termux edition | com.termux |
Official Termux package ecosystem. Timely package updates but cannot be installed alongside official Termux. |
| Nix edition | com.termux.launcher.nix |
The full nixpkgs collection with declarative configs and rollbacks, and it can be installed alongside official Termux. Releases tagged vX.Y.Z-nix (marked pre-release). arm64-v8a and x86_64. See Nix edition. |
| Demo edition Deprecated | io.vaj.tl |
Its manually compiled package repo is not updated anymore — at most consider it a demo, not recommended for daily use. Migrate to the Nix edition. arm64-v8a only. |
Download & installation
- Download the Main APK from the project’s Releases.
-
Optionally, the matching Termux:API or Termux:Styling (styling is largely unnecessary — fonts and colors are handled in-app):
- Termux edition: Termux:API & Termux:Styling (plain tags)
- Nix edition: TLNix:API & TLNix:Styling (
nix-v*tags)
Notes:
- Ensure you’re downloading the same set of items — mixing official add-ons, old forks, or APKs signed with a different key breaks the install; Android rejects shared-UID/signature mismatches.
- On first launch the app downloads bootstrap packages. You only need the Main APK to try the launcher.
Set it up
Install a nerd font — go to Settings → Appearance → Terminal fonts and install one from the in-app picker (the recommended setup is one tap). Prompts, TUIs and the setup script below all use nerd-font icons, so do this first. Details on Terminal fonts.
Shell configs — to get the terminal themes that source your wallpaper’s Material colors (fish, oh-my-posh, eza, zoxide, the Neovim colour scheme and the showcase tools), use the store that ships inside the launcher once the bootstrap finishes and you reach the shell.
For the Termux and VAJ editions — details on Shell goodies:
tlstore shell      # the fish shell setup in one go
tlstore install    # pick anything else, Claude Code included
For the Nix edition (com.termux.launcher.nix) — run after initializing the launcher flake, see Nix edition:
setup-toolkits
A config you already have is never replaced without showing you the change first, and every replaced file gets a timestamped .bak.
- Make it your Home app — Settings → Launcher & Apps → Set as default launcher. Android shows its Home-app picker; you can switch back anytime from Android Settings.
- Shared storage — run
termux-setup-storageto reach your internal shared storage from the shell. - Use it as a terminal only — if you don’t want it as your home app, long press the terminal → More → Settings → Launcher & Apps → Terminal Only. It disables the launcher features; each can be turned back on individually.
Docs
- Home Launcher - dock, app drawer, quick reply, app launching gestures, lock screen.
- Command Palette - every launcher action, searchable from the keyboard or a gesture.
- Terminal - graphics protocols, the multiplexer, floating panes, workspaces and the status bar.
- Terminal fonts - the in-app picker,
fonts.conf, gap-free box drawing and symbol maps. - Essential notifications - rules that pin the notifications you wait for above the prompt.
- Permissions - what the app asks for and why, including Shizuku.
- in-app keyboard - the built-in Unexpected Keyboard port and custom layouts.
- Nix edition - first setup,
setup-toolkitsand daily Nix commands. - LLM backends - local models over an OpenAI/Ollama-compatible API.
- Shell goodies - the optional setup script and the CLI tools it installs.
- configs - keybindings, fonts and properties.
- Backup & recovery - updating safely, what to back up, common fixes.
DOCUMENTATION
Home Launcher
- Pin Apps to Dock: Long press on the empty space in the dock to pin your favorite apps.
- App actions on hold: long press any app icon - in the dock or in the filtered row - for its Android shortcuts plus App info, Uninstall, Change app icon, Change dock icon and Unpin.
name: app-icon-menu
title: App actions
caption: Long-pressing a docked icon for its shortcuts, app info and icon options.
- Folders: drag and drop an icon onto another to create a folder.
- Custom app icons: for the entire app or just the pinned rows.
- Quick reply to notifications: for pinned apps which have an unread notification, swipe up on the app icon to respond to the message right there - the Android keyboard opens with it, send, and you’re back at the terminal. It works using the “reply” field on the app’s notification (needs notification access - see Permissions).
image: assets/uploads/quick-response.gif
title: Quick reply
caption: Swiping up on a pinned app with an unread notification and replying without opening the app.
- Most used apps page: enables an additional page at the end of pinned app pages showing your most frequent non-pinned apps. Toggle it from Settings > Launcher & Apps.
-
Double tap the Alphabets Row to lock screen: two options;
- Shizuku - sends the power button keypress, so your phone’s system screen-off animation plays and secure lock behaves normally.
- Accessibility - the normal method all launcher apps use, via the Android accessibility service.
App launching
You have a few options;
-
The A-Z row: tap an alphabet to see filtered app icons; a normal tap opens the app.
- Slide horizontally on the alphabets row and apps filter as you go - slide up to the icons row without lifting your finger, over to the app you want, and let go to launch.
- Apps are ranked by usage, so over time your most launched apps sit closest to the alphabet - minimal finger movement.
- More than one page of results? Hold your finger near the left/right edge and it auto-scrolls.
name: app-row-scrub
title: A-Z app row
caption: Sliding across the alphabet row - the icons above filter as you go, and letting go over one launches it.
- From the prompt: type the app search prefix (
%by default, change it in Settings > Launcher & Apps > App Search prefix) followed by a query. The app row shows results; Enter opens the first, arrow keys navigate, or just tap an icon.
name: app-launching
title: Launch from the prompt
caption: Typing "%" and a query at the prompt searches installed apps; Enter opens the first result.
- Command palette:
Ctrl+Alt+Shift+Por swipe up on the space bar - every installed app is a row, same usage ranking. See Command Palette. - Direct keybinds: bind a chord to any app in
~/.termux/termux-launcher-bindings.conf- see configs.
The app drawer
Swipe down on the app icons row for a traditional app drawer. Three layouts, in Settings > Launcher & Apps > App Drawer;
- Vertical scroll
- Horizontal paginated scroll
- Categories
src: assets/showcase/features/app-drawer-layouts
title: App drawer layouts
caption: Switching among the vertical, horizontal-paged and category drawers on the current dev build.
In landscape, the dock becomes a vertical rail on the side selected in settings and the drawer uses a denser grid. Insets keep both surfaces clear of display cutouts and the system navigation bar.
src: assets/showcase/features/landscape-launcher
title: Landscape launcher
caption: The side dock rail, terminal and dense app drawer adapting to the wider display.
shape: wide
layout: full
About categories: established launchers sort apps using server-side configs they tune on the fly. Termux Launcher has no such server, so you have 2 options under Drawer layout > Sort apps into categories;
image: assets/screenshots/drawer-category-sorting.webp
title: Category sorting choices
caption: Run Gemma on-device, or copy a prompt to an AI chat and paste the result back.
- On this device - on devices that can run the gemma4-e2b or e4b local LLMs (models downloaded via TAI), it uses them to sort your apps into categories.
- Copy prompt for ai chat - if your device can’t, or you just don’t want a language model on your phone: copies a prompt with your installed app list to the clipboard. Paste it into any free AI chat online, then paste the response back into the app (or the persistent notification) for the same result.
DOCUMENTATION
Nix edition
The Nix edition (com.termux.launcher.nix) pairs the launcher with Nix-on-Droid: the full nixpkgs collection, declarative configs, generations and rollback - and it coexists with a stock Termux install. First bootstrap is bigger and slower than the standard edition; keep the app in the foreground and use decent wifi.
Grab it from Releases - the vX.Y.Z-nix prerelease. Companions are the nix-v* tagged TLNix:API and TLNix:Styling.
First setup
When the bootstrap asks about flakes, answer yes. Once you have a shell, initialize the launcher config:
cd ~/.config/nix-on-droid
rm flake.nix nix-on-droid.nix
nix flake init -t github:PickleHik3/nix-on-droid/launcher-nix#launcher
nix-on-droid switch --flake ~/.config/nix-on-droid
setup-toolkits
Note: the
rmreplaces the bootstrap config on purpose - only run it in that directory, and back up first if you already customized it.
setup-toolkits is a checklist over the launcher flake’s optional toolkits (shell essentials, eye candy, language toolchains) - it’s the Nix edition’s equivalent of the setup script. Rerun it anytime:
setup-toolkits --list            # current selection, no changes
setup-toolkits --essentials      # shell + eye candy only
setup-toolkits --enable node,go  # add toolkits, leave the rest
Daily commands
nix search nixpkgs ripgrep
nix profile install nixpkgs#ripgrep
nix profile list
nix profile remove ripgrep
nix-on-droid rollback
Put durable choices in the flake instead of piling up an unexplained profile - rollback is only useful when generations mean something. Your flake IS your backup: with it you can rebuild the whole environment on a new phone.
Coming from the deprecated VAJ edition? The VAJ → Nix migration guide covers backing up your home, installing side by side and replacing APT packages from nixpkgs.
DOCUMENTATION
Command Palette
Every action the launcher knows - splits, sessions, windows, appearance, clipboard, even launching Android apps - lives in one searchable list. Keybinds, keyboard gestures and the palette all run the same actions, so anything you can bind to a key you can also just type.
name: command-palette
title: Command palette
caption: Swipe up from the space bar, type "split", run it - the keycap strip shows the chord for what matched.
Opening it
Any of these:
- Swipe up from the space bar of the in-app keyboard.
- Ctrl + Alt + Shift + P on a hardware keyboard.
- Ctrl + Alt + Space, release, then P (two-stroke chord).
- Long press the terminal and pick Command palette from the action sheet.
Using it
- The palette opens with just a search box and a strip of four keycaps - your most used actions end up there over time.
- Type to filter. Matching is forgiving: titles, word starts, fuzzy letters, action ids (“split pane” finds Split pane vertically) and even keybinds (typing
ctrl+alt+vfinds whatever is bound to it) all work. - Press ↓ with nothing typed to browse the whole catalogue, grouped by category.
- Enter runs the focused action, Esc or a tap outside closes.
- If nothing matches, Enter runs what you typed in the shell instead - so a quick command doesn’t need a round trip to the keyboard.
Some rows want more from you:
- Rows marked
›open a small submenu of choices (like pane resize directions). - Rows marked
argsask you to type a value - rename a session, for example - then Enter applies it. - Destructive actions (like Kill focused pane) ask for confirmation first.
- Rows that can’t run right now stay visible but greyed out, with the reason (“no text selected”, “no active session”).
What’s inside
- Pane - splits, focus, resize, float/dock, layouts, scratchpad.
- Window / Session - create, close, switch, rename, session browser, save & load workspaces.
- Terminal - toggle keyboard and dock, font size, search scrollback, hints, share transcript, reset.
- Clipboard - copy selection, paste.
- Appearance - wallpaper, cursor trail, surface editor.
- Apps - every installed Android app appears as a row, ranked by how often you launch things. This is separate from the
%app search in the terminal, but both use the same ranking. - Sessions - every live session as a row, jump straight to it.
Handy defaults
A few worth remembering (the full set, and how to change them, is on the configs page):
| Keys | Action | |
|---|---|---|
| Ctrl + Alt + V / H | Split pane vertically / horizontally | |
| Ctrl + Alt + arrows | Move pane focus | |
| Ctrl + Alt + F | Float / dock the pane | |
| Ctrl + Alt + ` | Toggle scratchpad | |
| Ctrl + Alt + K | Toggle the keyboard | |
| Ctrl + Alt + S | Search scrollback | |
| Ctrl + Alt + 1…9 | Jump to session by number |
Tip: hold Ctrl + Alt on the in-app keyboard and the bound keys light up with a legend of what they do.
Every one of these can be remapped, and new keys bound to any palette action, from ~/.termux/termux-launcher-bindings.conf - see configs.
DOCUMENTATION
Terminal
The terminal core is upstream Termux, with a lot built on top. This page covers what’s different.
Images, GIFs and graphics
Three graphics protocols are supported out of the box - nothing to enable:
- Sixel and iTerm2 inline images - so
img2sixel,chafaand friends just work. - Kitty graphics protocol - the full modern set: PNG and raw pixel data, placements, z-index, and animation. Send an animated GIF through it and it keeps playing on the terminal’s own clock, even after the program that sent it exits.
Tested clients: timg -pk, chafa -f kitty, and yazi’s image previews all work. One caveat: kitten icat itself isn’t usable - kitty’s kitten binary isn’t packaged for Android and crashes before reaching the terminal. Use timg or chafa instead.
src: assets/showcase/raw/fetch
title: Graphics in a pane
formats: mp4
caption: fastfetch drawing its logo through the kitty graphics protocol, over a wallpaper-themed prompt.
Fonts and text rendering
Font handling is ported from kitty: per-style fonts (regular/bold/italic/bold italic), nerd-font symbol mapping that never breaks cell widths, ligature control, variable-font axes and cell-metric tweaks. There is an in-app picker for all of it and a ~/.termux/fonts.conf for hand-editing - the whole system, including gap-free box drawing, is on the Terminal fonts page. The old ~/.termux/font.ttf and Termux:Styling still work if you never touch either.
Text shaping is real: ZWJ emoji, flags, Arabic, Indic conjuncts and programming ligatures render correctly, and selection/copy/resize don’t mangle them.
There’s also a subtle cursor trail - a short streak when the cursor jumps, so you never lose it in a full-screen app. On by default, toggleable from the palette (Toggle cursor trail), and it turns itself off in battery-saver mode.
Touch
Touch is tuned for TUIs rather than plain shells:
- Drag scrolls, always - one or two fingers. Inside mouse-aware apps the drag is translated to scroll-wheel events, so lists in
htop, lazygit or vim scroll naturally. - Tap = mouse click when the app tracks the mouse.
- Press-and-hold, then drag to send a real mouse drag (select text in vim, resize tmux panes). You’ll feel a small haptic when it engages. A quick long-press without moving still gives you normal text selection with the copy toolbar.
- Pinch to zoom changes font size - with jitter filtering so two-finger scrolling doesn’t accidentally zoom.
- Scrolled up reading something? Live output no longer yanks you to the bottom - the view stays put until you scroll back down.
The multiplexer
No tmux needed - the app is one natively. The hierarchy is sessions → windows → panes, and everything below is reachable from the Command Palette, keybinds, extra keys, or the space-bar swipes on the built-in keyboard.
name: window-splitting
title: Window splitting
caption: One pane split in two, focus moved, then reshaped - no tmux running.
- Splits - vertical/horizontal, arrow-key focus movement, keyboard resize, drag the dividers.
- Layouts - six presets (grid, tall, fat, horizontal, vertical, stack); Next pane layout (
Ctrl+Alt+L) cycles them and the window keeps re-tiling new panes to match until you hand-shape it. - Floating panes - pop any pane out with
Ctrl+Alt+F. Drag the top handle to move, the corner grip to resize; tap its pill for close/dock buttons. Positions survive app restarts. - Scratchpad -
Ctrl+Alt+` (backtick) summons a dedicated floating shell above whatever you’re doing; toggle again and it hides, but the shell keeps running and follows you across windows and sessions. Perfect for a music player or a quick calculation. - Windows - like tmux windows:
Ctrl+Alt+Cnew,Ctrl+Alt+[/]to switch, pills in the status row to tap. Pills label themselves after the file open in your editor, or the running process. - Sessions - fully separate workspaces of windows. Tap the chip at the left of the status row for the sessions panel, or open the Session browser for a searchable tree of every session, window and pane (it searches working directories and running programs too).
- Workspaces - save the whole arrangement (windows, panes, floats, working directories) to a named file and load it later or after a reboot. Save workspace / Load workspace in the palette; files live in
~/.termux/workspaces/as JSON. Layout comes back with fresh shells in the right directories - running programs are not resurrected.
If you want none of this, Settings → Terminal IO → Single-pane compatibility mode returns the terminal to plain Termux behaviour.
Status bar
The glass strip at the top is two tiers:
- The status row: the session chip, window pills, then CPU, RAM and weather widgets - tap any of them for a drop-down detail card (per-core load and top processes, or the hourly/weekly forecast).
- The widget area: a clock (six styles - flip, LCD, LED and more), up to three pinned notifications (which ones is up to you - see Essential notifications), and a media / now-playing widget with controls when something plays in the background.
And it stacks downward with gestures:
- Slide down on the status bar to reveal the clock.
- Swipe up closes the expanded clock again.
image: assets/screenshots/clock-status-pane.webp
title: Expanded clock and status pane
caption: The current clock surface above the session, CPU, RAM and weather row.
Everything is toggleable in Settings → Terminal & Status, and the glass itself (blur, opacity, grain, corner radius) is edited live on your real wallpaper via the surface editor. RAM works without elevated access; CPU uses a best-effort direct fallback, while detailed CPU/memory and process data need Shizuku. Weather needs location.
The same screen has an experimental Lazy Mode for idle battery: the clock stops animating and the CPU/RAM readings sample far less often, which takes the launcher’s idle CPU use down to a fraction of what it was. The detail cards still get every sample when open. If testing goes well it will become the default.
src: assets/showcase/features/surface-editor
title: Surface editor
caption: Previewing clock styles and switching among the live dock, keyboard, status and terminal surfaces.
name: statusbar-modes
title: Status bar modes
caption: The widget area moving through clock, media and pinned-notification modes, then the CPU detail card.
Small but nice
- Hints (
Ctrl+Alt+U) - keyboard-labelled overlays for URLs, paths andfile:linereferences on screen; pick one to open or insert it. - Scrollback search (
Ctrl+Alt+S). - Clickable links - OSC 8 hyperlinks are underlined; tapping shows you the full target before opening.
- Prompt jumping - jump between shell prompts from the palette. Works out of the box in fish; bash/zsh need one
sourceline (configs). - Kitty keyboard protocol - modern TUIs get full key disambiguation (all five enhancement levels).
- Key inspector - a palette action that shows exactly what any key press produces: the Android event, which keybind claimed it, and the bytes sent to the shell. Great for debugging a custom layout or binding.
DOCUMENTATION
Terminal fonts
Font handling is ported from kitty and then taken further. There are three ways in and they stack: an in-app picker for people who just want a good font, the classic ~/.termux/font.ttf for people who already have one, and ~/.termux/fonts.conf for people who want every knob.
Which file wins
Read this once and the rest of the page stops surprising you. Config is loaded in this order, and a later duplicate directive replaces an earlier one:
~/.termux/fonts.d/*.conf- drop-ins, read first, in ascending filename order. The app writes exactly one of them,10-launcher.conf.~/.termux/fonts.conf- your own file, read last, so it wins every directive it mentions.~/.termux/font.ttfand~/.termux/font-italic.ttf- used for any face the files above left unset. This is what Termux:Styling writes.- Android
monospace- the last resort.
So a hand-written fonts.conf beats the picker, and the picker beats Termux:Styling. If you set a font in the app and nothing changes on screen, you have a fonts.conf overriding it.
The easy path - the picker
Settings → Appearance → Terminal fonts is a font store: it downloads from the upstream release, checks it against a SHA-256 pinned in the app, installs it under ~/.termux/fonts/, and writes the managed drop-in for you. Nothing needs a shell, and the catalog ships inside the APK so the list works offline.
image: assets/screenshots/terminal-fonts-picker.webp
title: Terminal font picker
caption: The managed Maple Mono setup, rendering controls and installed family cards.
- Recommended setup - one tap installs Maple Mono (a 373 KB download) with its ligatures on and icon glyphs routed to the bundled Symbols Nerd Font Mono. Same result as the Shell goodies script’s font step, without the 20 MB Nerd Font build.
- Families - fourteen curated families. Each row shows the download size, face count, whether it is variable and whether it ligates, plus a License button with the full notice and upstream link before anything is fetched.
- Nerd Font icons - routes
U+E000-U+F8FFandU+F0000-U+FFFFDto the bundled symbols face, so powerline, devicon, codicon and Material Design glyphs work with any family. The symbols face is in the APK, not downloaded. - Ligature policy - the three
disable_ligaturesvalues, spelled out: always shaped, un-fuse under the cursor, or off. - Weight - a
wghtslider for variable families only. Moving it moves bold with it, so the family keeps its own regular-to-bold contrast. - Use font.ttf / Termux:Styling - the exit. It deletes
~/.termux/fonts.d/10-launcher.confand nothing else: yourfonts.confand the installed font files stay where they are.
| Family | Download | Faces | Notes |
|---|---|---|---|
| Maple Mono (recommended) | 373 KB | 4 | Variable wght 100-800, ligatures. The face the shaping was tuned against. |
| Intel One Mono | 494 KB | 4 | Designed with and for low-vision developers. Smallest full four-face download. |
| Hack | 601 KB | 4 | Four hand-tuned static faces, no ligatures. Smallest download in the catalog. |
| Commit Mono | 707 KB | 4 | Deliberately neutral, smart kerning; alternates are opt-in font_features. |
| JetBrains Mono | 1.1 MB | 4 | Tall x-height, wide ligature set. |
| 0xProto | 1.2 MB | 3 | Legibility-first shapes; ships no bold italic. |
| Fira Code | 2.3 MB | 2 | No italic upstream, so italics stay synthetic. |
| Monaspace Neon | 4.0 MB | 2 | Variable wght 200-800, texture healing; ligatures live in stylistic sets. |
| Comic Shanns Mono | 8.6 MB | 2 | Comic letterforms on honest monospace metrics, icons already patched in. |
| Victor Mono | 8.8 MB | 4 | Semi-connected cursive italics. |
| MesloLGS NF | 9.8 MB | 4 | The Powerlevel10k face - prompt glyphs align with no tweaking. |
| Cascadia Code | 23.7 MB | 4 | Variable wght 200-700, cursive italics. One large upstream archive. |
| Rec Mono Casual | 48.1 MB | 4 | Brush-loop letterforms across all four faces, not only the italics. |
| Iosevka Term | 56.2 MB | 4 | Narrow slab grotesk, enormous Unicode coverage; Nerd Font build. |
Most are SIL Open Font License 1.1. The exceptions: Hack is MIT plus the Bitstream Vera License, Comic Shanns Mono is MIT, MesloLGS NF is Apache License 2.0, and the bundled Symbols Nerd Font Mono is MIT. Installing writes a LICENSE.txt next to the faces so the attribution travels with the files.
Installing also mirrors the regular and italic faces to ~/.termux/font.ttf and font-italic.ttf, so plain Termux tooling and other forks see a sane font even though they know nothing about fonts.d.
The same screen is reachable without leaving the terminal: fonts.pick opens the picker and fonts.install installs a family by id, both from the Command Palette, a keybind or an extra key.
The box drawing below is the same machinery the sigye clock leans on - see Shell goodies.
The simple path - font.ttf
Unchanged from upstream Termux. Drop a TrueType file at ~/.termux/font.ttf, optionally ~/.termux/font-italic.ttf, or let Termux:Styling do it, then:
termux-reload-settings
No fonts.conf, no fonts.d, no picker needed. Bold and bold italic are synthesized from the regular face; italic comes from font-italic.ttf when you supply it and is synthesized otherwise.
The power path - fonts.conf
~/.termux/fonts.conf is a kitty-style config. A fully commented reference copy is refreshed at ~/.termux/launcher/examples/fonts.conf on every app start, and termux-reload-settings applies your edits without restarting the app.
font_family        path=~/.termux/fonts/maple-mono/regular.ttf
bold_font          path=~/.termux/fonts/maple-mono/bold.ttf
italic_font        path=~/.termux/fonts/maple-mono/italic.ttf
bold_italic_font   path=~/.termux/fonts/maple-mono/bold-italic.ttf

font_variations    regular wght=400
font_variations    bold    wght=700
font_features      regular +zero

disable_ligatures  cursor
modify_font        cell_width 95%
Worth knowing:
- Face sources are
path=(absolute or starting~/) orfamily=for an Android system family. Paths are the reliable case on Android; afamily=lookup is best-effort. disable_ligaturestakesnever(the default),cursororalways, and touches programming ligatures only - Arabic, Indic, emoji and combining-mark shaping are never affected.font_featuresandfont_variationstargetregular,bold,italic,bold_italic,symbols, or a named symbol map.noneclears a target.modify_fontadjustscell_width,cell_height,baseline,underline_position,underline_thickness,strikethrough_positionandstrikethrough_thickness. A percentage (10% to 500%) replaces the font-derived metric; a bare number or one ending inpxadds pixels (-256 to 256).- Bad lines are skipped and counted in a toast, with the full text in logcat - the rest of the file keeps working.
- Limits per file: 64 KiB, 512 lines, 4096 characters per line.
Keep selected symbols narrow
Kitty-compatible symbol expansion lets an icon use blank cells after it, which makes Nerd Font glyphs match the text height around them. Use narrow_symbols when a range must stay within a fixed number of cells:
narrow_symbols U+E0A0-U+E0A3,U+E0C0-U+E0C7
narrow_symbols U+F0000-U+FFFFD 3
The optional trailing cell ceiling defaults to 1 and may be 1 through 5. When several lines match a code point, the last one wins. Synthesized Powerline separators do not need a rule; setting powerline_symbols font hands them back to the font and makes them subject to narrow_symbols.
image: assets/screenshots/narrow-symbols-comparison.webp
title: Symbol width comparison
caption: Default symbol expansion on the left; the same Material symbols constrained to one cell on the right.
shape: wide
layout: full
The ~/.termux/fonts.d/ directory is the drop-in half of the same config. Anything valid in fonts.conf is valid in a *.conf file there, the files are concatenated in ascending filename order, and the app’s own 10-launcher.conf is just one of them. The 10- prefix leaves room on both sides, so a 05- file lands before it and a 20- file after. Drop-ins are capped at 32 files and 256 KiB in total; that budget never squeezes out your fonts.conf, which keeps its own allowance. Symlinks pointing out of fonts.d are ignored.
Seamless box drawing
Fonts disagree about box drawing. A face designed for prose leaves a background-colored seam between two adjacent ─, puts the crossbar of ┼ off the centerline of │, and usually covers none of the block, braille or legacy-computing ranges at all - so a TUI drawn with it looks perforated. Every glyph in those ranges is a handful of rectangles, so the terminal computes them from the cell instead of asking the font for a glyph, snapped to the integer pixel edges that adjacent cells already share.
The result: TUI frames, block ramps and braille graphs join cleanly at any font size, after a pinch-zoom, and after modify_font changes the cell. This is on by default.
image: assets/screenshots/box-drawing-comparison.webp
title: Box drawing comparison
caption: Synthesized, seamless cell joins on the left; font glyph seams and misalignment on the right.
shape: wide
layout: full
box_drawing        synthesize
box_drawing_scale  0.001,1,1.5,2
powerline_symbols  synthesize
box_drawing synthesizeis the default.box_drawing fontturns it all off and hands every one of those code points back to your font’s glyphs.box_drawing_scalesets the stroke widths of the four line weights - thin, light, heavy and very heavy - as multipliers of a base stroke derived from the cell height. Four values, comma or space separated, each above 0 and at most 8; the shipped default is0.001 1 1.5 2. Thin is deliberately near zero: it names a hairline, and the one-pixel floor produces one at any size.powerline_symbolsdefaults tosynthesize, so separator edges sit flush with the cell and two consecutive separators butt together with no sliver of background between them. It needsbox_drawing synthesizeas well. Set it tofontfor a patched Nerd Font whose author drew their own.- An explicit
symbol_mapalways wins. If you deliberately routed a range to a font, that was a choice, and it is respected over the geometry.
Synthesized ranges:
| Range | What it is |
|---|---|
U+2500-U+257F |
Box Drawing - lines, corners, crosses, dashes, arcs, doubles |
U+2580-U+259F |
Block Elements - full, half, eighth and quadrant blocks, shades |
U+25E2-U+25E5 |
The four corner triangles from Geometric Shapes |
U+2800-U+28FF |
Braille Patterns - the whole block, as used by graph and plot tools |
U+1FB00-U+1FB3B |
Legacy Computing sextants |
U+1FB70-U+1FB8F |
Legacy Computing eighth bars and corners, and half medium shades |
U+E0B0-U+E0B7, U+E0BA-U+E0BD |
Powerline separators - unless powerline_symbols font |
Not synthesized - these still come from your font or your symbol_map, by design, so they are not a bug: the rest of Geometric Shapes (U+25A0-U+25E1 and U+25E6-U+25FF), the Legacy Computing wedges and diagonals (U+1FB3C-U+1FB6F), the inverse shades, pattern fills, arrows and segmented digits (U+1FB90-U+1FBFF), and the diagonal Powerline separators (U+E0B8-U+E0B9 and U+E0BE-U+E0BF) even in synthesize mode.
Many fonts at once
symbol_map routes chosen Unicode ranges to another font file without changing the cell width, so the grid stays intact. It is repeatable, a later overlapping map wins, and each map can carry its own name so its shaping is tuned separately:
symbol_map name=icons  U+E000-U+F8FF,U+F0000-U+FFFFD path=~/.termux/fonts/symbols/SymbolsNerdFontMono.ttf
symbol_map name=cjk    U+4E00-U+9FFF                path=~/.termux/fonts/NotoSansMonoCJK-Regular.otf
font_features icons    +ss01
font_variations cjk    wght=450

fallback_font path=~/.termux/fonts/NotoEmoji-Regular.ttf
fallback_font family="Noto Sans Symbols 2"
- Names are 1 to 32 characters of
A-Z a-z 0-9 _ -and cannot reuse a face target name. Naming a map that was never declared is an error, reported and dropped. - A named map’s own
font_featuresandfont_variationswin for its own cells, and the terminal breaks a text run whenever two adjacent maps differ in them, so neighbouring maps really do shape independently. - Anything a map does not declare comes from the shared
symbolstarget - which is also what unnamed maps use - sofont_features symbols +ss01is the default for every map without a line of its own. - An axis a mapped face cannot honour is reported once and dropped, leaving that face at its own default rather than breaking the config.
- Ceilings: 256
symbol_maplines, 1024 ranges in total, and 8fallback_fontentries.
fallback_font is the answer to “Android picked an emoji or CJK font I did not choose”. It is an ordered chain, tried in the order written, and the per-cell order is: an explicit symbol_map first, then synthesized box drawing, then the cell’s own face, then the fallback_font chain, then Android’s platform fallback. The chain is only consulted when the cell’s own face genuinely lacks the glyph, and the first configured face that has it wins - so you decide what covers the gaps instead of Android deciding for you.
Why only four faces
Because ANSI SGR only distinguishes bold and italic. Every combination of the two is one of exactly four addressable faces - regular, bold, italic, bold italic - and no escape sequence exists to ask for a fifth. That is a limit of the protocol every terminal speaks, not of this config.
The number of font files in play is much higher: four faces, plus up to 256 symbol_map targets, plus 8 fallback_font entries. What SGR cannot do is let a program say “set this word in semibold condensed”. For that, move the axis with font_variations and the whole face moves with it.
DOCUMENTATION
Essential notifications
Android’s shade is a pull-away from whatever you are doing. The status bar at the top of the terminal can hold up to three notifications in place instead, so the ones you actually wait for - a code, a reply, a build result - sit above the prompt until you deal with them.
Nothing is pinned by default. You choose what qualifies by writing rules, and with no rules the feature stays idle: no pins, and the clock keeps its full size.
Turning it on
Settings → Terminal & status, in the notification section:
- Media and pinned notifications - opens Android’s notification-access screen. Without this grant the launcher cannot read notifications at all, so no rule can ever match. The same grant is what powers the media widget.
- Essential notification rules - the rule list, and where you add one.
image: assets/screenshots/essential-notification-rule.webp
title: Essential notification rule
caption: Match an app package, keywords or both, with optional source-notification clearing.
What a rule is
Two fields and a checkbox:
- App package - matched exactly against the posting app, case-insensitive.
com.whatsapp, notWhatsApp. Leave it blank to mean any app. - Keywords in title or text - a case-insensitive substring, not a pattern.
otpmatches “Your OTP is 481920”. It is tested against the notification’s title and its body, and a pin matches if either contains it. Leave it blank to mean any text. - Dismissing the pin also clears the notification - off by default. Off, swiping the pin away only removes it from the pane and the notification stays in the shade. On, the source notification is cancelled too, so the pin is the only place you need to deal with it.
At least one of the two fields must be filled. A rule with both blank would pin everything, so it is rejected - the dialog says Enter an app package, keywords, or both.
Some shapes worth stealing:
| Package | Keywords | What it catches |
|---|---|---|
| (blank) | otp |
One-time codes from any app |
com.whatsapp |
(blank) | Every WhatsApp notification |
com.google.android.gm |
invoice |
Only invoice mail |
| (blank) | build failed |
CI results from whichever app reports them |
Two details that decide behaviour once you have more than one rule:
- The first matching rule wins. Rules are tested in list order, so a narrow rule placed above a broad one takes precedence - useful when you want one app’s matches cleared on dismiss and everything else left alone.
- A rule cannot be added twice. Its identity is derived from the package and keywords, so re-adding the same pair is a no-op rather than a duplicate.
The list holds 32 rules; past that the dialog reports Rule list is full.
What happens on screen
- Three pins at most. A fourth match evicts the oldest rather than growing the stack.
- Order is stable. Pins already on screen keep their positions, and new matches are appended oldest-first by post time - so a pin never jumps around underneath your finger while you are reading it.
- Tapping a pin opens what the notification points at, by sending the notification’s own content intent, exactly as tapping it in the shade would. Only if there is no such intent, or it has been cancelled, does the app’s plain launcher entry get used. Notifications marked auto-cancel are cleared afterwards, as the shade does.
- Dismissing a pin keeps it gone for as long as that notification stays active, even though the rule still matches. If the app reposts it, it can pin again.
Pins share the widget slot with the clock, so the clock gives up room as pins arrive: full size with nothing pinned, compact with one or two, and down to a mono chip with all three. One pin alongside an active media session is the one case where both are shown together. The Terminal page covers the rest of the status bar.
Where the rules live
They are stored as a JSON array in the app’s own preferences under essential_notification_rules, defaulting to []. Each entry is {"id":…, "package":…, "match":…, "clear":…}. There is no shell command or config file for this yet - the dialog is the only way to edit rules, and a malformed or unusable entry is dropped on load rather than breaking the list.
DOCUMENTATION
Permissions
A home screen that is also a terminal ends up asking for a few permissions that look scary out of context. Here is what each one actually does. The short version: everything below is optional - deny anything and only that one feature stops working. The app manages them all from Settings → Services & permissions.
The big ones
Default home app. The whole point - Android asks you to confirm this the normal way. You can always switch back in system settings.
Notification access. Powers the notification dots on app icons, the dock popup you get when swiping up on an app with an unread notification (including the quick-reply box), and the now-playing media widget in the status bar. The launcher reads only what it needs to draw those; notification content is not used for anything else. Without it: no dots, no quick reply, no media controls.
Accessibility service. Used for exactly one thing: locking the screen when you double-tap the alphabets row. The service is declared with screen-reading and gesture abilities disabled - it can only send the “lock screen” action. If you’d rather not enable an accessibility service, the Shizuku lock method does the same job.
Shizuku. The privileged backend, if you have Shizuku or Sui set up. It powers the nicer screen-lock method (a real power-button keypress, so the system’s screen-off animation plays and secure lock behaves normally), detailed CPU/memory and top-process data in the status bar, and foreground-process labels on window pills. RAM totals remain available without it through Android’s ActivityManager, while CPU uses a best-effort direct /proc fallback when the device allows it.
Connecting it: install Shizuku and start its service (Wireless debugging or root, per Shizuku’s own guide), then Settings → Services & permissions → Shizuku → Connect and approve the dialog. Two things worth knowing;
- The privileged backend only initializes when you connect it from that settings page. Until then, the CPU card uses whatever the direct
/procfallback can read and detailed process data may be absent. - A Wireless-debugging start does not survive a reboot. Start Shizuku again, then revisit the settings page to reconnect; everything falls back to unprivileged data in the meantime.
Storage / All files access. Only for the classic Termux ~/storage symlinks (termux-setup-storage), so the shell can reach your shared storage. The launcher itself doesn’t touch your files.
Regular permissions
| Permission | Used for |
|---|---|
| Internet | pkg installs, model downloads, the weather card |
| Approximate location | The status-bar weather card, nothing else |
| Notifications | The persistent session notification and download progress |
| Wake lock | The “Acquire wakelock” action on the session notification, to keep long jobs alive |
| Battery optimization exemption | Asked when you take a wakelock, so Doze doesn’t kill your session |
| Display over other apps | Lets a background command (Tasker / RUN_COMMAND) bring the terminal to the front; deny and you tap the notification instead |
| Vibrate | Terminal bell and keyboard haptics |
| Set wallpaper | The “set as wallpaper” action in the launcher |
| Run at boot | Boot scripts (Termux:Boot style) |
| Install packages | So APKs opened from the terminal can be handed to the system installer |
One custom permission is defined by the app: com.termux.permission.RUN_COMMAND (or io.vaj.tl.permission.RUN_COMMAND on the demo edition). Other apps must hold it - and you must approve them - before they can run commands in your shell. That protects you; the launcher doesn’t ask you for it.
Inherited from upstream
A few declarations come along from the Termux base and do nothing in normal use: microphone (exists so Termux:API’s termux-microphone-record can work, since add-ons share the app’s identity - the launcher itself never records), and several system-level entries (READ_LOGS, DUMP, WRITE_SECURE_SETTINGS, usage stats) that Android will not grant to a regular app anyway - they only matter if you deliberately grant them over ADB, e.g. for the phantom-process-killer workaround.
Worth noting what’s absent: the app does not request QUERY_ALL_PACKAGES. The app drawer uses the normal launcher-app query every home screen uses.
DOCUMENTATION
in-app keyboard
The launcher ships a built-in port of Unexpected Keyboard by Jules Aguillon - a brilliant little keyboard originally designed for programmers using Termux. Its trick: every key has up to eight extra characters on its corners, typed by swiping the key towards them. That puts Esc, Tab, Ctrl, arrows and all of shell punctuation on a normal-sized keyboard without cramming in extra rows. If you like it, check out (and support) the upstream project - it’s also a standalone keyboard app on Google Play and F-Droid.
The port is baked into the app as a view - no separate keyboard to install, no Android input-method setup, and it doesn’t touch your system keyboard for other apps. It shows when you tap the terminal; toggle it with the Keyboard button, the palette, or Ctrl + Alt + K. Prefer your regular keyboard? Settings → Keyboard & input → On-screen keyboard switches between Built-in terminal keyboard, Android keyboard and None.
image: assets/uploads/whatsapp-image-2026-08-02-at-12.36.58-am.jpeg
title: Built-in keyboard
caption: The built-in keyboard - corner symbols on every key, real Ctrl and Alt.
What it can do
- Corner swipes - swipe any key towards a corner for the symbol printed there. Small circle on a key gives its shifted character.
- Real modifiers - Ctrl and Alt are actual keys. Tap to latch for the next key, double-tap to lock.
- Fn layer - hold Fn for F1–F12 on the letter rows, plus Esc, Tab, Home/End, PgUp/PgDn, arrows on the home row, and Ctrl+C / Ctrl+D on N / M.
- Extra layers - a numeric layer and a Greek & math layer.
- Space bar gestures - swipe up opens the Command Palette; the corners switch windows and sessions; slide left/right moves the cursor.
- Extra keys picker - add optional keys (Copy, Paste, Select all, Undo, F11/F12, dead keys and more) from Settings → Keyboard & input → Extra keys.
- Keybind hints - hold Ctrl + Alt and the keys with bindings light up with a legend.
name: keybind-discovery
title: Keybind hints
caption: Holding Ctrl + Alt lights the bound keys and prints the chord map above them.
Looks
The keyboard follows your wallpaper’s Material colors, and everything about it is adjustable: height, key spacing, corner radius, keys opacity, glass blur, a custom label font, and full color-scheme editing with live preview (including importing Base16/Base24 themes). Start from Settings → Keyboard & input → Customize keyboard surface - it drops you into the surface editor on your real home screen so you tweak against the real background.
Custom fonts
The keyboard’s key labels can use any font you like. Settings → Keyboard & input → Typeface lets you pick any .ttf font file - the keys redraw with it immediately. This is separate from the terminal’s fonts (those live in Settings → Appearance → Terminal fonts, see Terminal fonts), so the keyboard and the terminal can each have their own.
image: assets/uploads/whatsapp-image-2026-08-02-at-12.36.17-am-1-.jpeg
title: Keyboard surface editor
caption: Tuning the keyboard's glass, colors and spacing live on the real home screen.
Custom layouts
The whole layout is one XML file. Drop your own at:
~/.termux/keyboard/layout.xml
and it replaces the bundled layout (run termux-reload-settings or reopen the app to apply; delete the file to go back). A fully commented copy of the default layout sits at ~/.termux/launcher/examples/keyboard-layout.xml - the best starting point, since it documents the 8-slot key model and the launcher’s tool: key values (any palette action can live on any key slot).
Handy resources:
- The web layout editor - build a layout visually, paste the XML out.
- Upstream’s layout format docs and possible key values - both also linked from the keyboard settings.
If your XML has a mistake, the keyboard falls back to the last working layout and tells you the line number. Settings → Keyboard & input → Custom layout validates the file on demand.
One limit: tool: keys can’t carry arguments, so you can’t put “launch WhatsApp” directly on a key - bind a key chord to app.launch in the bindings file instead (configs).
DOCUMENTATION
LLM backends
The launcher can run language models entirely on your phone - no cloud, nothing leaves the device. Two runtimes are built in:
| LiteRT-LM (Google) | MNN-LLM (Alibaba) | |
|---|---|---|
| Model format | .litertlm / .task packages |
MNN-converted models (config.json) |
| Chat, vision, audio input | ✓ | ✓ |
| Tool calling | native | prompt-based |
| Thinking / reasoning traces | ✓ | - |
| Embeddings | ✓ (.tflite) |
✓ |
| Runs on | CPU or GPU | CPU or GPU |
Loaded models are served over OpenAI-compatible and Ollama-compatible APIs on localhost, so existing clients, SDKs and CLIs work against your phone the same way they’d talk to the real thing. This whole subsystem is called TAI (Termux AI) in the settings.
Getting a model
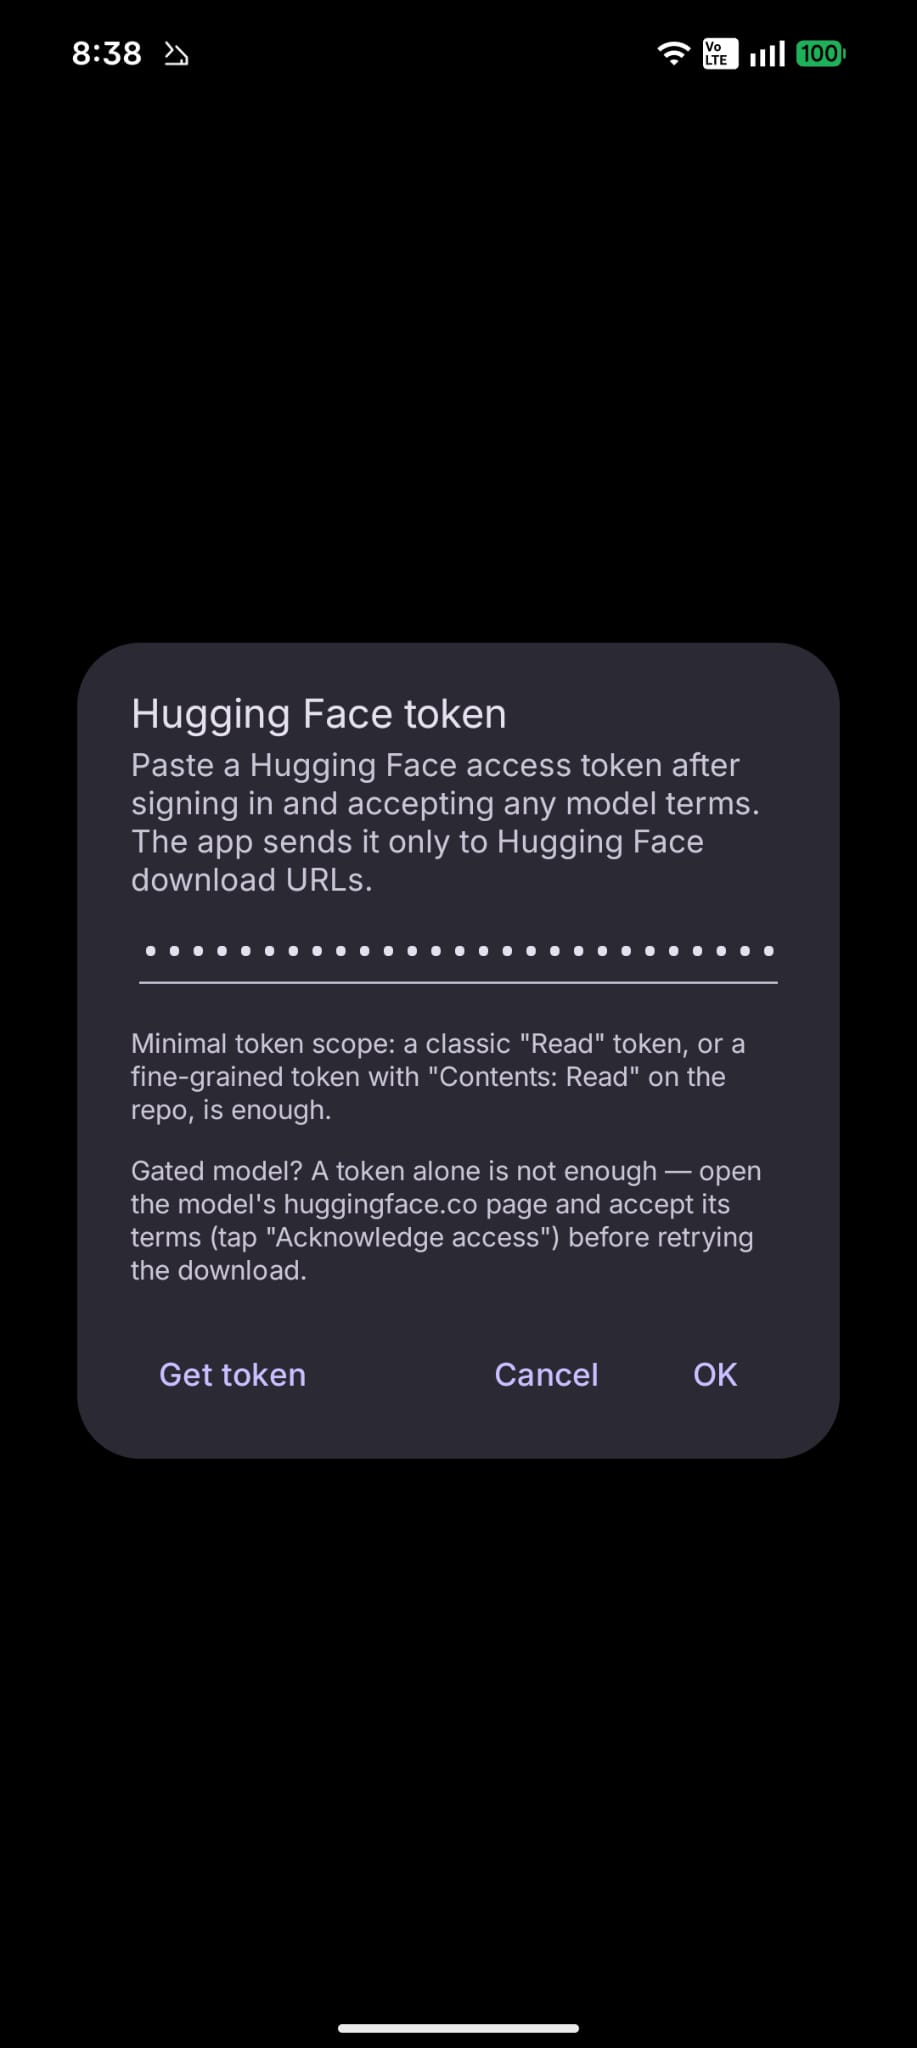
Open Settings → Services & permissions → TAI · Termux AI → Browse Catalog. The catalog lists ready-to-use models (Gemma, Qwen, DeepSeek distills and more), each with its download size, RAM requirement and license. Models download from Hugging Face; gated ones (like Gemma) ask for a Hugging Face token first, and every download shows the provider’s license to accept.
A few things to know before downloading:
- Start small. Downloads run from ~300 MB to several GB, and the RAM tier listed per model is real - a preflight check runs before every load and refuses if the device doesn’t have the memory.
- You can also import your own: a local
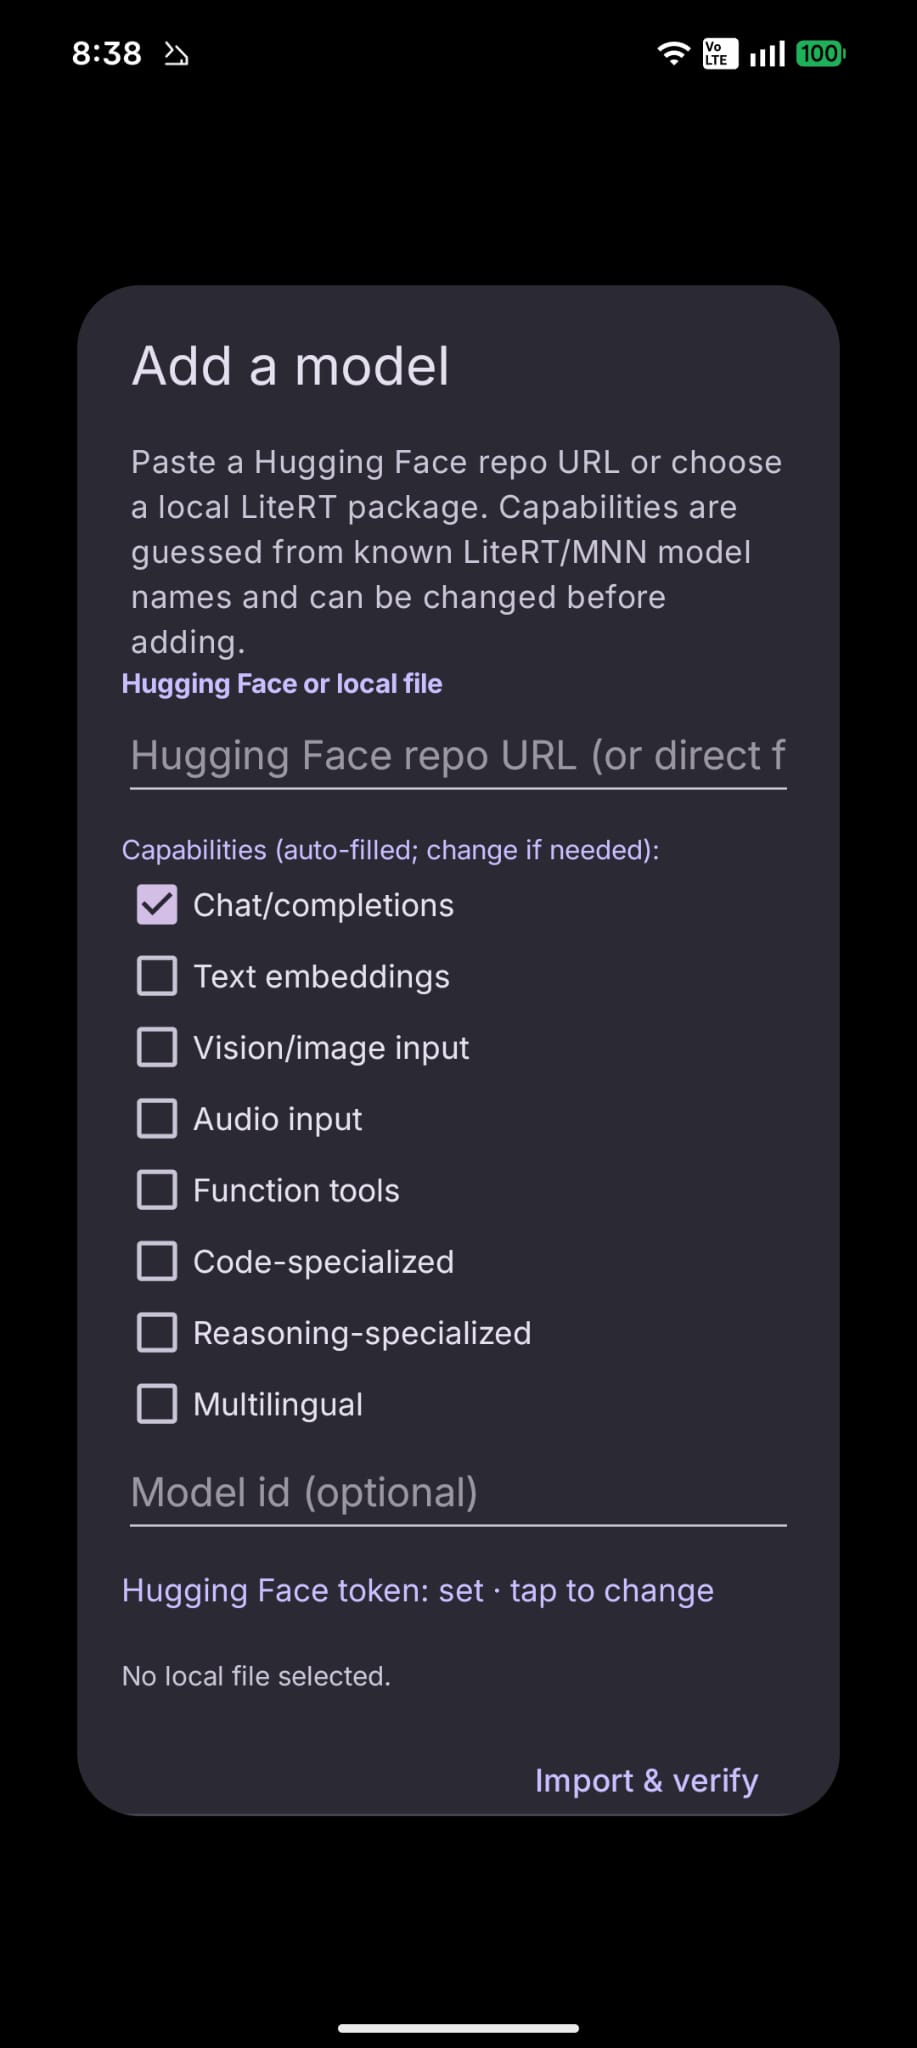
.litertlm/.task/.tflitefile, or a Hugging Face URL (for MNN, a link to the model’sconfig.json). GGUF, safetensors and other raw-weight formats are not supported.
image: assets/screenshots/tai-import.jpeg
title: Model import
caption: The import window - paste a Hugging Face repo URL and TAI downloads, verifies and registers it.
image: assets/screenshots/tai-endpoint.jpeg
title: Endpoint & access
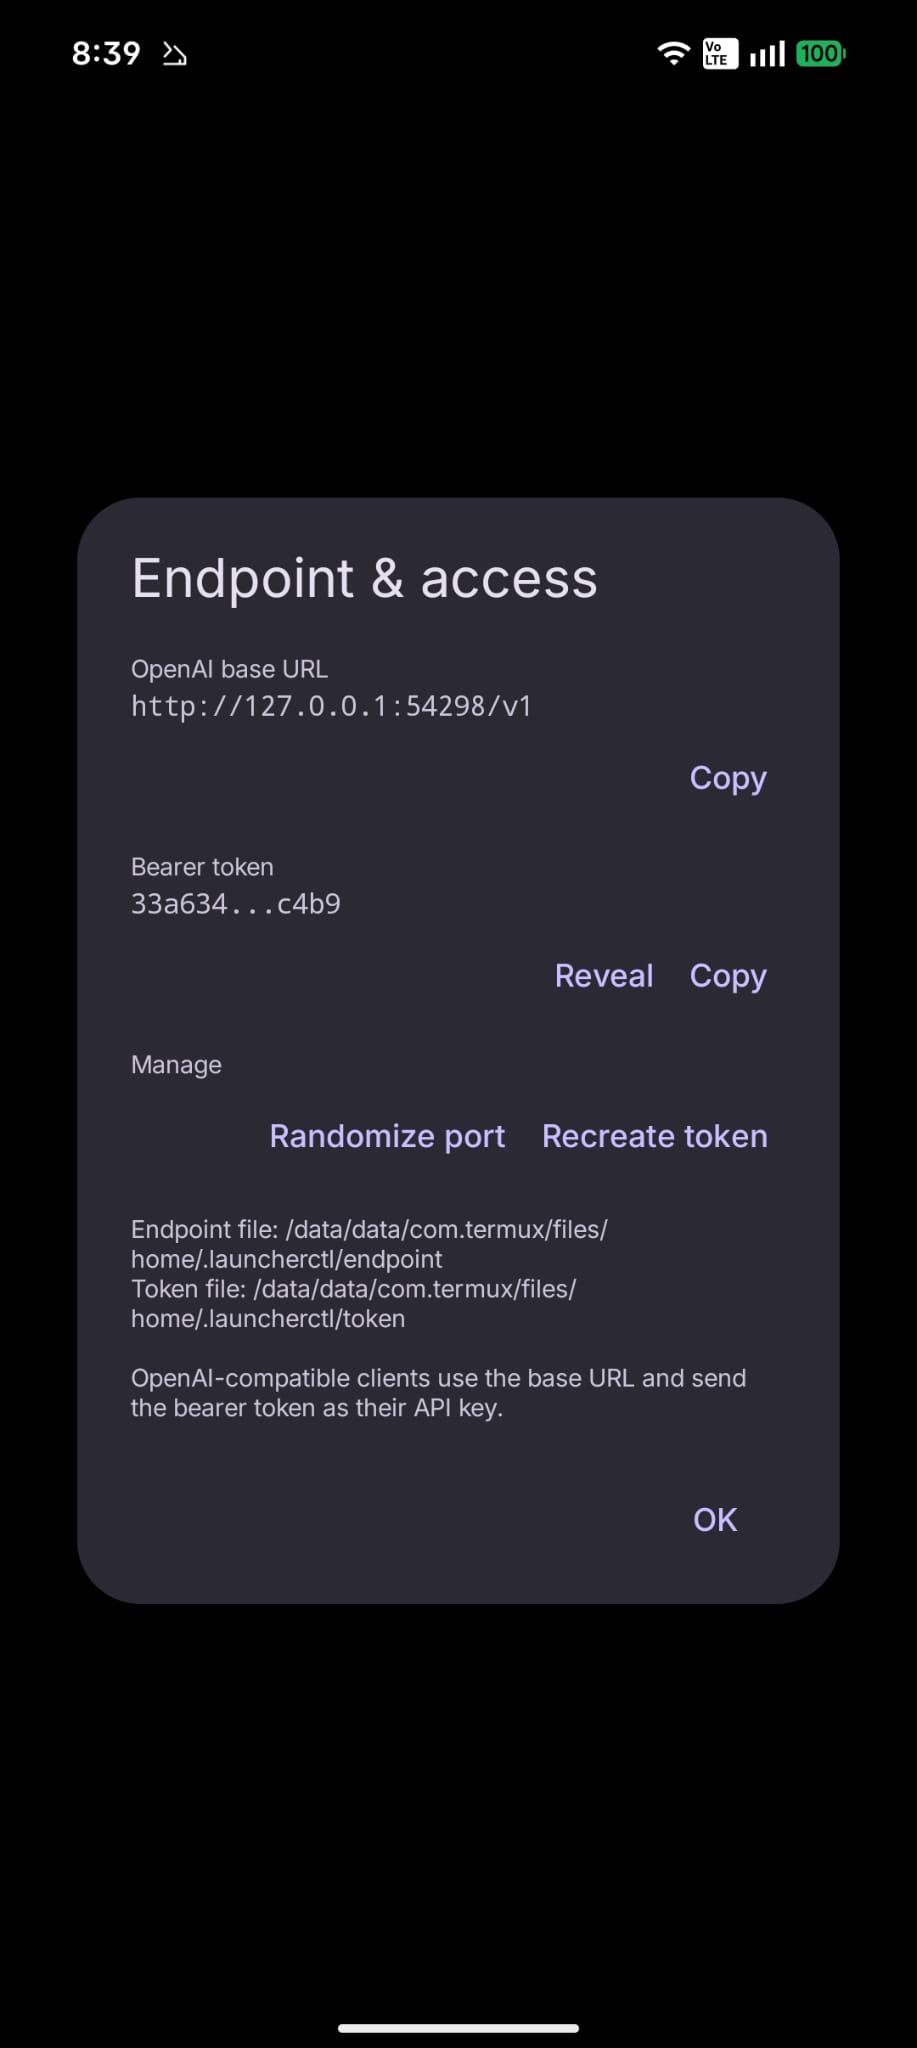
caption: Endpoint & access - the base URL and bearer token any OpenAI/Ollama client needs.
Managing it from the shell
The tai command manages the host - it’s not a chat client:
tai status      # what's running, current settings
tai models      # installed models and their capabilities
tai load        # load the default model (or: tai load MODEL_ID --gpu)
tai unload      # release all model memory
tai keep-warm   # keep the model resident (--minutes N)
tai preflight   # check a model would load, without loading it
tai doctor      # runtime + server health in one shot
tai download, tai import, tai downloads and tai cancel cover the rest. Add --json to any command for machine-readable output.
Connecting a client
The server writes its address and token to disk, so clients can pick them up without hardcoding anything:
export OPENAI_BASE_URL="$(cat ~/.launcherctl/endpoint)/v1"
export OPENAI_API_KEY="$(cat ~/.launcherctl/token)"
- OpenAI-shaped:
/v1/chat/completions,/v1/responses,/v1/completions,/v1/embeddings, with streaming. - Ollama-shaped (same port, no
/v1):/api/chat,/api/generate,/api/embed,/api/tags.
The server listens on localhost only by default; a LAN option exists in settings and always requires the token. Full endpoint reference with request/response examples is on the Termux AI page in the site navigation.
How memory is handled
Phones don’t have RAM to waste, so the runtime is strict about it:
- One generation model is resident at a time. Loading another (even on the other backend) unloads the current one first.
- Multimodal LiteRT models are split into separate
-text/-vision/-audiomodel ids by default, so asking for text doesn’t pay the RAM cost of the vision and audio encoders. A “combined” mode is available in Advanced settings. - Embedding models don’t occupy the slot at all - they’re served on demand alongside the chat model.
- Idle models unload themselves after 10 minutes by default (configurable) - a countdown shows on the status bar while a model is resident;
tai keep-warmextends it when you know you’ll be back. - Models run in a separate process, so a native crash can’t take the launcher (your home screen) down with it.
DOCUMENTATION
Shell goodies
The launcher works with whatever shell setup you already have. But if you want the setup from the demo videos - fish shell, a Material-themed prompt that follows your wallpaper, nice ls, smart cd - the launcher ships a small store that sets it all up in one go.
tlstore
tlstore (or tl, tls for short) is already on your PATH; the app puts it there. Nothing to download, nothing to read through first.
tlstore shell            # fish, the prompt, eza, zoxide and the plugins, in one go
tlstore install          # a picker over everything else
tlstore update           # bring what you have up to date
tlstore display          # set up graphics for Linux apps
Seven things are on offer:
| Item | What you get |
|---|---|
fish-shell |
fish with the launcher’s config, an oh-my-posh prompt themed from your wallpaper, eza as ls, zoxide as cd, and fisher with puffer-fish and autopair. |
omp-theme |
Just the prompt theme, for a fish or oh-my-posh setup you already have. |
nvim-theme |
A Neovim colour scheme that follows your wallpaper — works in AstroNvim, LazyVim, NvChad or plain Neovim (:colorscheme launcher-material). |
fastfetch |
System information beside an animated logo. Drop any GIF at ~/Pictures/gif/skel.gif and it plays there. |
sigye |
A clock for the terminal. |
kitten |
Kitty’s companion tool, for images and files in the terminal. |
claude-code |
Anthropic’s Claude Code, about 200 MB. Sign in by running claude; tlstore update keeps it current. |
A config you already have is never replaced silently: tlstore update shows you the change and asks. Every file it does replace gets a timestamped .bak next to it. Tools land in ~/.local/bin, so a bootstrap reinstall does not take them with you.
Fonts are not part of the store: the in-app font picker (Settings › Appearance › Terminal fonts) downloads and wires up curated families, Nerd Font builds included.
image: assets/uploads/whatsapp-image-2026-08-02-at-12.40.06-am.jpeg
title: tlstore shell result
caption: The shell after tlstore shell - fish, wallpaper-Material prompt, eza listings.
Wallpaper colors in the shell
The launcher writes your current Material palette to ~/.termux/material-colors.sh whenever the wallpaper theme changes. The installed fish config sources it and re-checks it on every prompt, so open shells pick up a new wallpaper theme without restarting. The oh-my-posh themes and your scripts can use the exported TERMUX_MATERIAL_* variables (primary, surface, error, the full terminal 16-color set and more).
Fonts
Fonts moved into the app: the font picker (Settings › Appearance › Terminal fonts) downloads curated families - Nerd Font builds included - and wires them up for you. For manual control, ~/.termux/fonts.conf still works; see Terminal fonts.
Extras in the repo
The same examples folder has more you can grab by hand: a tmux config with a matching Material theme, and a system monitor and weather widget for status bars.
Things worth installing
Two from the wider terminal world that lean on the graphics and font work - both in the repo:
name: kew
title: kew
caption: kew - music in the terminal, cover art drawn through the kitty graphics protocol.
name: sigye
title: sigye
caption: sigye - the clock in box-drawing glyphs, which join because the launcher computes them as geometry.
DOCUMENTATION
configs
Everything lives in ~/.termux/. Fully commented reference copies of every config are kept fresh in ~/.termux/launcher/examples/ on each app start - when in doubt, read those. After editing any file, apply it without restarting:
termux-reload-settings
| File | What it controls |
|---|---|
~/.termux/termux.properties |
Classic Termux properties + the extra-keys row |
~/.termux/termux-launcher-bindings.conf |
Custom keybindings |
~/.termux/fonts.conf |
Fonts, nerd-font symbols, ligatures, box drawing - see Terminal fonts |
~/.termux/fonts.d/ |
Drop-in font fragments, including the app-managed 10-launcher.conf |
~/.termux/colors.properties |
Terminal colors (only when wallpaper colors are off) |
~/.termux/keyboard/layout.xml |
In-app keyboard layout - see in-app keyboard |
Keybindings
~/.termux/termux-launcher-bindings.conf binds keys to any action from the Command Palette - the palette is also where you discover action ids and see which keys are already taken. The format is kitty-inspired:
# map <keys> <action> [arguments]
map ctrl+alt+w        app.launch com.whatsapp
map ctrl+alt+shift+n  session.new name=build
map ctrl+alt+t        send-text "echo hi\n"
map ctrl+alt+enter    send-key ctrl+c

# chords: press the first stroke, release, press the next
map ctrl+alt+space>t  app.launch org.telegram.messenger

# remove a default binding
unmap ctrl+alt+s
Worth knowing:
- Key names are case-insensitive; modifiers are
ctrl,alt,shift. - Binding a key that already has a default replaces the default; repeating the same keys on multiple lines runs the actions in order.
- Arguments can be positional or
name=value. --when splits-on/--when splits-offmakes a binding apply only in one terminal mode.- Bad lines are skipped and reported - the rest of the file keeps working.
- The Key inspector action in the palette shows you exactly what the app sees when you press something.
termux.properties
All the upstream Termux properties work. The launcher adds one thing: extra keys can trigger any palette action with the tool: syntax:
extra-keys = [[ \
  {macro: "tool:workspace.picker", display: "▤"}, \
  {macro: "tool:terminal.toggle_scratchpad", display: "▣"}, \
  {macro: "tool:pane.move_to_edge:edge=left", display: "⇤"} \
]]
tool:<action-id> runs the action; arguments ride along as :name=value pairs. The shipped example (~/.termux/launcher/examples/) has a full row with workspace picker, window switching, pane controls and scratchpad.
Fonts
~/.termux/fonts.conf is a kitty-style font config. Without it, the classic ~/.termux/font.ttf / font-italic.ttf still work. With it you get per-style fonts, nerd-font symbol mapping and ligature control:
font_family        path=~/.termux/fonts/MapleMono[wght].ttf
italic_font        path=~/.termux/fonts/MapleMono-Italic[wght].ttf
font_variations    regular wght=400
font_variations    bold    wght=700

# pull icon glyphs from a nerd font without affecting text width
symbol_map U+E000-U+F8FF path=~/.termux/fonts/MapleMono-NF-Regular.ttf

disable_ligatures cursor
font_features regular +zero
Also available: bold_font, bold_italic_font, family="…" to use an installed family instead of a file, and modify_font to nudge cell width/height, baseline and underline metrics. The example file documents every directive. The setup script writes a ready-made Maple Mono version of this.
Colors
By default the terminal is themed from your wallpaper (Material You) - Settings → Look & feel → Use wallpaper colors. While that’s on, colors.properties is ignored. Turn it off to use your own colors.properties, same format as upstream Termux.
The current palette is also exported for scripts as ~/.termux/material-colors.sh / .properties - see Shell goodies.
Shell integration
Prompt-jumping (Jump to previous/next prompt in the palette) needs the shell to mark prompts (OSC 133). fish 4 does this out of the box. For bash or zsh, source the script the app keeps in place:
# ~/.bashrc
source ~/.termux/shell-integration/termux-launcher.bash
# ~/.zshrc
source ~/.termux/shell-integration/termux-launcher.zsh
The app updates those scripts itself but never touches your rc files.
DOCUMENTATION
Keybindings & multiplexer
Termux Launcher routes panes, windows, sessions, terminal controls, and app shortcuts through one action registry. The command palette, physical keyboard, embedded in-app keyboard, and Termux Extra Keys can therefore reach the same actions, but each surface has a different configuration syntax.
This page covers ~/.termux/termux-launcher-bindings.conf: the full keybinding layer used by the in-app multiplexer. See Action reference for action IDs and arguments, Keyboard layout schema for embedded keyboard swipe slots, and Extra Keys recipes for termux.properties.
Start from the shipped example
The app creates the live binding file if it is absent and refreshes a pristine reference copy on every app start:
~/.termux/termux-launcher-bindings.conf
~/.termux/launcher/examples/termux-launcher-bindings.conf
Edit only the live file, then reload without restarting the launcher:
termux-reload-settings
The basic grammar is:
map   [options] <key-sequence> <action-id> [arguments...]
unmap [--mode <name>] <key-sequence>
Examples:
map ctrl+alt+g pane.equalize
map ctrl+alt+shift+1 pane.layout grid
map ctrl+alt+w app.launch com.whatsapp
map ctrl+alt+t send-text "printf 'hello from a binding\n'\n"
map ctrl+alt+enter send-key ctrl+c
unmap ctrl+alt+u
Mentioning a root sequence with map or unmap replaces every built-in mapping for that exact sequence. Repeating the same sequence and condition appends another action, so the actions run from top to bottom.
Built-in multiplexer shortcuts
Bindings match Android key codes: they follow physical US key positions, not the character produced by the current language layout.
| Shortcut | Split panes on | Split panes off / compatibility mode |
|---|---|---|
Ctrl+Alt+V |
Split vertically, creating side-by-side panes | Paste |
Ctrl+Alt+H |
Split horizontally, creating stacked panes | Unclaimed |
Ctrl+Alt+Arrow |
Focus the pane in that direction | Left/right closes or opens the drawer; up/down changes session |
Ctrl+Alt+Shift+Arrow |
Grow the focused pane in that direction | Unclaimed |
Ctrl+Alt+C |
New window | New session |
Ctrl+Alt+X |
Close the current window | Unclaimed |
Ctrl+Alt+[ / Ctrl+Alt+] |
Previous/next window | Unclaimed |
Ctrl+Alt+L |
Next automatic pane layout | Unclaimed |
Ctrl+Alt+F |
Float or dock the focused pane | Unclaimed |
Ctrl+Alt+R |
Rename window prompt | Rename session prompt |
Ctrl+Alt+Shift+C |
New session | New session |
Ctrl+Alt+Shift+X |
Close the current session | Unclaimed |
Ctrl+Alt+N / Ctrl+Alt+P |
Next/previous session | Next/previous session |
Ctrl+Alt+1 … Ctrl+Alt+9 |
Activate session 1 … 9 | Activate session 1 … 9 |
Ctrl+Alt+Shift+S |
Toggle sessions panel | Toggle sessions panel |
Ctrl+Alt+K |
Toggle soft keyboard | Toggle soft keyboard |
Ctrl+Alt++ / Ctrl+Alt+- |
Increase/decrease font size | Increase/decrease font size |
Ctrl+Alt+M |
Terminal action sheet | Terminal action sheet |
Ctrl+Alt+U |
Terminal hints | Terminal hints |
Ctrl+Alt+S |
Search scrollback | Search scrollback |
Ctrl+Alt+Shift+P |
Command palette | Command palette |
Ctrl+Alt+Space, then P |
Command palette | Command palette |
Ctrl+Alt+Backtick |
Toggle scratchpad | Unclaimed |
The same stroke can safely have two meanings when their conditions cannot overlap. Use --when to do that in your own file:
map --when splits-on  ctrl+alt+v pane.split_vertical
map --when splits-off ctrl+alt+v clipboard.paste
--when accepts always (the default), splits-on, or splits-off.
Supported key names
A sequence can contain one to eight strokes separated by >. Key names and modifiers are case-insensitive; control is accepted as an alias for ctrl.
| Kind | Tokens |
|---|---|
| Modifiers | ctrl, alt, shift |
| Letters and digits | a … z, 0 … 9 |
| Function keys | f1 … f12 |
| Navigation | left, right, up, down, home, end, pageup, pagedown |
| Editing | space, tab, enter, escape, backspace, delete |
| Punctuation | [, ], minus, equals, plus, /, \, ;, ', ,, ., backtick |
Examples:
map ctrl+alt+space>w app.launch com.whatsapp
map ctrl+alt+space>g pane.rotate
map ctrl+alt+f12 terminal.toggle_toolbar
Avoid bare letters and plain Alt+letter at the root unless you deliberately want to intercept them. Shells and editors commonly use Alt as an Escape prefix. Ctrl+Alt or a leader chord is less disruptive.
Action arguments
Required arguments can be positional in schema order. Any argument can instead use name=value; quote values containing spaces.
map ctrl+alt+shift+1 pane.layout grid
map ctrl+alt+shift+2 pane.move_to_edge edge=left
map ctrl+alt+shift+w window.select index=0
map ctrl+alt+shift+n session.new name=build failsafe=false
map ctrl+alt+shift+s workspace.save name=project overwrite=true
map ctrl+alt+shift+r session.rename "build shell"
Values are checked against the action schema. Integers must be in range, booleans must be exactly true or false, and enum values must match the listed spelling. Unknown arguments invalidate only that line.
Arrow strokes automatically provide a direction, and Ctrl+Alt+1 … 9 automatically provide a zero-based index. An argument written in the file overrides the value inferred from the key.
Send text or a terminal key
send-text writes decoded text directly to the focused shell. Double-quoted and unquoted values understand \n, \r, \t, and \e; single-quoted values stay literal.
map ctrl+alt+j send-text "cd ~/src\n"
map ctrl+alt+j send-text "git status\n"
map ctrl+alt+enter send-key ctrl+c
map ctrl+alt+space>x send-key escape
send-key accepts one supported stroke, not a chord. It uses the terminal’s current cursor-key and keypad modes when encoding special keys.
Modal keymaps
A mode is a persistent leader layer. This keeps ordinary shell shortcuts free while putting many launcher actions behind one prefix:
map --new-mode nav --timeout 10 --on-unknown passthrough --on-action keep ctrl+alt+space
map --mode nav h window.previous
map --mode nav l window.next
map --mode nav v pane.split_vertical
map --mode nav s pane.split_horizontal
map --mode nav w app.launch com.whatsapp
map --mode nav q pop-mode
map --mode nav escape pop-mode
| Option | Values | Default |
|---|---|---|
--new-mode |
A name using letters, digits, _, -, or ., up to 32 characters |
none |
--timeout |
0 … 3600 seconds |
2 |
--on-unknown |
beep, ignore, end, passthrough |
beep |
--on-action |
keep, end |
keep |
--mode |
Add a mapping to an existing named mode | root map |
Modes can stack. pop-mode (or its compatibility alias pop_keyboard_mode) exits the top mode. The launcher displays the pending chord and active mode in a non-focusable overlay.
Using bindings from the in-app keyboard
The embedded keyboard emits the same Android key events used by physical keyboards. Latch Ctrl and Alt, then press the suffix key to trigger a binding; while the prefix is latched, the launcher shows the available suffixes and highlights matching keys.
For a one-gesture button or swipe, assign the registry action directly in ~/.termux/keyboard/layout.xml instead. Direct layout actions cannot carry arguments, while the binding file can. See Keyboard layout schema.
Limits and diagnostics
The binding file is limited to 256 KiB, 4,096 lines, and 4,096 characters per line. Invalid lines are skipped; other valid mappings remain active.
Open Key inspector from the command palette to see the Android key code, normalized stroke, action that claimed it, active Kitty keyboard flags, and bytes sent to the shell. It is intentionally unbound by default, but you can add:
map ctrl+alt+shift+k app.key_inspector
If all launcher shortcuts stop working, check that hardware keyboard shortcuts are not disabled in termux.properties, then run termux-reload-settings again.
DOCUMENTATION
Action reference
These are the current action IDs accepted by ~/.termux/termux-launcher-bindings.conf, the command palette, tool: keys in the embedded keyboard, and tool: entries in Termux Extra Keys.
Which surfaces accept arguments?
| Surface | Action syntax | Arguments |
|---|---|---|
| Binding file | map … <action-id> [arguments] |
Positional required values and name=value |
| In-app keyboard XML | tool:<action-id>:<glyph> |
None; the suffix is a display glyph, not arguments |
termux.properties Extra Keys |
tool:<action-id>:name=value,name=value |
Named values after the second colon |
| Command palette | Search by action title or ID | Shows actions it can run or prompt for interactively |
An action with a required argument is unsuitable for a direct in-app keyboard tool: slot. Put it in the binding file, or use an Extra Key that can carry arguments.
Argument notation
In the tables below, required means the value must be supplied. A value marked optional uses the shown default when omitted.
Panes
Pane and window actions require split panes to be enabled.
| Action ID | Arguments | What it does |
|---|---|---|
pane.split_vertical |
none | Split the focused pane side by side |
pane.split_horizontal |
none | Split the focused pane into a stacked pair |
pane.focus_direction |
direction: left, right, up, or down (required) |
Focus the neighboring pane |
pane.resize |
direction: left, right, up, or down (required) |
Grow the focused pane toward an edge |
pane.kill_focused |
none | Terminate the focused pane’s shell |
pane.layout |
layout: stack, grid, tall, fat, horizontal, or vertical (required) |
Apply and retain an automatic layout |
pane.equalize |
none | Reset all current dividers to equal ratios |
pane.rotate |
direction: clockwise or counterclockwise (optional, clockwise) |
Rotate the pane tree |
pane.move_to_edge |
edge: left, right, up, or down (required) |
Move the focused pane to an outer edge |
pane.next_layout |
none | Cycle grid → tall → fat → horizontal → vertical → stack |
pane.toggle_float |
none | Float the focused pane or dock it again |
pane.rename |
name (required; empty restores the default) |
Rename the focused pane’s shell |
pane.rename_prompt |
none | Open the interactive rename editor for the focused pane |
Examples:
map ctrl+alt+g pane.equalize
map ctrl+alt+shift+1 pane.layout grid
map ctrl+alt+shift+2 pane.move_to_edge left
map ctrl+alt+space>r pane.rotate direction=counterclockwise
Windows
A window is a multiplexer workspace inside the current launcher session and may contain several panes.
| Action ID | Arguments | What it does |
|---|---|---|
window.new |
none | Create a new window with a fresh shell |
window.close |
none | Close the current window and all of its panes |
window.next |
none | Switch to the next window |
window.previous |
none | Switch to the previous window |
window.select |
index: 0 … 64 (required, zero-based) |
Select a window by index |
window.rename |
name (required; display is capped at 14 characters) |
Rename the current multiplexer window label |
window.rename_prompt |
none | Open the interactive rename dialog |
Sessions and workspaces
| Action ID | Arguments | What it does |
|---|---|---|
session.new |
name (optional), failsafe (optional, false) |
Create a terminal session |
session.browser |
none | Open the searchable session/window/pane browser |
session.panel |
none | Toggle the sessions panel under the status row |
session.clone_current |
none | Create a fresh session at the focused pane’s CWD |
session.next |
none | Activate the next session |
session.previous |
none | Activate the previous session |
session.close_current |
none | Close the current session and its windows/panes |
session.activate_by_index |
index: 0 … 64 (required, zero-based) |
Activate a session by drawer position |
session.rename |
name (required; capped at 8 characters; empty clears it) |
Rename the current session’s drawer label |
session.rename_at_index |
index: 0 … 64, name (both required; name capped at 8 characters) |
Rename a session by its zero-based drawer index |
session.rename_prompt |
none | Open the interactive session rename dialog |
workspace.picker |
none | Open the saved-workspace picker |
workspace.save_prompt |
none | Prompt for a name and save the live topology |
workspace.save |
name (required), overwrite (optional, false), captureCommands (optional, false) |
Save sessions, windows, panes, ratios, focus, and CWDs |
workspace.load |
name (required), mode: append or replace (optional, append), runCommands (optional, false) |
Restore a saved workspace |
workspace.list |
none | Return the saved workspace list; mainly useful to internal callers |
workspace.delete |
name (required) |
Delete a saved workspace definition |
Workspace names are at most 64 Unicode code points. They must begin with a letter or digit and may then contain letters, digits, spaces, _, -, or .. Do not include .json.
Terminal and clipboard
| Action ID | Arguments | What it does |
|---|---|---|
terminal.toggle_scratchpad |
none | Show or hide the persistent scratchpad shell |
terminal.toggle_soft_keyboard |
none | Show or hide the keyboard |
terminal.toggle_toolbar |
none | Show or hide the terminal dock |
terminal.font_size_increase |
none | Increase font size |
terminal.font_size_decrease |
none | Decrease font size |
terminal.select_url |
none | Open the URL picker for scrollback links |
terminal.hints |
none | Label visible URLs, paths, hashes, and source locations |
terminal.search_scrollback |
none | Search terminal history and jump to a result |
terminal.share_transcript |
none | Share the complete terminal transcript |
terminal.share_selected |
none | Share the currently selected terminal text |
terminal.reset |
none | Reset emulator state and scrollback without killing the shell |
terminal.jump_previous_prompt |
none | Jump to the previous OSC 133 prompt marker |
terminal.jump_next_prompt |
none | Jump to the next OSC 133 prompt marker |
terminal.action_sheet |
none | Open the curated terminal action sheet |
terminal.state |
resetPerformance (optional, false) |
Return terminal hierarchy/performance state; mainly useful to internal callers |
extrakeys.edit |
none | Open the visual Extra Keys editor |
clipboard.paste |
none | Paste clipboard contents into the focused shell |
clipboard.copy_selected |
none | Copy the current terminal selection |
Selection actions are available only while text is selected. Prompt jumping needs OSC 133 shell integration; fish 4 emits it natively, while Bash and zsh can source the scripts installed under ~/.termux/shell-integration/.
Appearance
| Action ID | Arguments | What it does |
|---|---|---|
appearance.set_wallpaper |
none | Open the wallpaper picker |
appearance.toggle_wallpaper |
none | Enable or disable terminal wallpaper mode |
appearance.toggle_cursor_trail |
none | Enable or disable the animated cursor trail |
appearance.glass_lab |
none | Enter dock and surface tuning mode |
fonts.pick |
none | Open the terminal font picker |
fonts.install |
id (required), nerd_icons (optional, true), ligatures: never, cursor, or always (optional, cursor), weight: 0 … 1000 (optional, 0) |
Download, verify and activate a catalog font family |
Launcher and apps
| Action ID | Arguments | What it does |
|---|---|---|
app.open_settings |
none | Open launcher settings |
app.open_look_and_feel |
none | Open Look & feel settings |
app.open_apps_bar |
none | Open Apps Bar settings |
app.command_palette |
none | Open the searchable command palette |
app.launch |
query (required) |
Launch by exact package, app label, or stable ID, with fuzzy ranking fallback |
app.key_inspector |
none | Toggle the key-event and terminal-byte inspector |
app.open_drawer |
none | Open the sessions drawer |
app.close_drawer |
none | Close the sessions drawer |
Examples:
map ctrl+alt+w app.launch com.whatsapp
map ctrl+alt+shift+m app.launch "Google Maps"
map ctrl+alt+shift+k app.key_inspector
Actions versus shell input
The binding file also provides three binding-only operations that are not registry IDs:
| Operation | Form | Purpose |
|---|---|---|
| Send text | send-text "text\n" |
Write literal decoded text to the focused shell |
| Send a key | send-key ctrl+c |
Encode one terminal key stroke |
| Leave a modal keymap | pop-mode |
Pop the current custom mode |
Use the command palette to discover current action IDs on-device. Required-argument actions may not appear as ordinary palette rows because the palette cannot always collect their schema; they remain valid in the binding file and in argument-capable Extra Keys.
DOCUMENTATION
Keyboard layout schema
The embedded keyboard is a Termux-focused port of Unexpected Keyboard. A custom file at ~/.termux/keyboard/layout.xml replaces the complete bundled layout, including every center key and swipe slot.
Start by copying the exact layout shipped with your installed build:
mkdir -p ~/.termux/keyboard
cp ~/.termux/launcher/examples/keyboard-layout.xml ~/.termux/keyboard/layout.xml
termux-reload-settings
Delete the live file to return to the bundled layout. If an edit is invalid, the launcher keeps the last working layout and then falls back to the bundled one.
Document structure
<?xml version="1.0" encoding="utf-8"?>
<keyboard bottom_row="false" name="My terminal keyboard" script="latin">
  <row>
    <key c="q" ne="1" se="loc esc"/>
    <key c="w" nw="~" ne="2"/>
  </row>
  <row height="0.95">
    <key width="1.7" c="ctrl" nw="fn"/>
    <key width="4.0" c="space" w="cursor_left" e="cursor_right"/>
    <key width="1.7" c="enter"/>
  </row>
  <modmap>
    <fn a="q" b="f1"/>
    <fn a="a" b="esc"/>
  </modmap>
</keyboard>
<keyboard> attributes
| Attribute | Meaning |
|---|---|
name |
Display name for the layout |
script |
Main script identifier; must not be empty when present |
numpad_script |
Optional script for the numeric layout; defaults to script |
bottom_row |
Whether the keyboard adds its bundled bottom row; default true |
embedded_number_row |
Whether to insert the optional number row inside this layout; default false |
locale_extra_keys |
Whether enabled optional keyboard keys may be merged into free loc slots; default true |
width |
Optional total layout width in relative units; otherwise computed from the widest row |
<row> attributes
| Attribute | Meaning |
|---|---|
height |
Relative row height; default 1 |
shift |
Empty vertical space above the row; default 0 |
scale |
Rescale all keys so the row reaches this total width |
<key> attributes
Each key has a center value plus eight swipe directions:
nw / key1     n / key7     ne / key2
w  / key5     c / key0     e  / key6
sw / key3     s / key8     se / key4
The short compass names and long key0 … key8 names are synonyms; do not put both synonyms on the same key.
| Attribute | Meaning |
|---|---|
c or key0 |
Center/tap value |
nw, n, ne, w, e, sw, s, se |
Swipe values |
width |
Relative key width; default 1 |
shift |
Empty horizontal space before the key; default 0 |
anticircle |
Value produced by the counter-clockwise circle gesture |
indication |
Label drawn on the key without changing its output |
role |
Optional rendering/behavior role used by the keyboard engine |
Prefix a value with loc to reserve its position while letting the keyboard’s optional-key setting decide whether it is visible:
<key c="a" nw="loc tab"/>
<key c="backspace" ne="loc delete"/>
Put launcher actions on keys and swipes
Any slot can call an argument-free launcher action:
tool:<action-id>
tool:<action-id>:<display-glyph>
The optional suffix is only the glyph drawn on the key. It is not an argument list.
This space bar keeps cursor sliding on east/west and puts multiplexer navigation on the corners:
<key width="4.0" c="space"
     w="cursor_left" e="cursor_right" s="switch_backward"
     n="tool:app.command_palette:⌘"
     nw="tool:window.previous:◧"
     ne="tool:window.next:◨"
     sw="tool:session.previous:↰"
     se="tool:session.next:↳"/>
You can also dedicate ordinary keys or unused swipe slots:
<row height="0.8">
  <key c="tool:pane.split_vertical:⇳" n="tool:pane.split_horizontal:⇔"/>
  <key c="tool:pane.equalize:=" n="tool:pane.next_layout:⟳"/>
  <key c="tool:pane.toggle_float:◈" n="tool:terminal.toggle_scratchpad:▣"/>
  <key c="tool:terminal.search_scrollback:⌕" n="tool:terminal.hints:?"/>
</row>
Actions that require arguments cannot run from layout.xml. For example, app.launch requires a query, pane.layout requires a layout name, and pane.move_to_edge requires an edge. Assign those in termux-launcher-bindings.conf or use an argument-capable Termux Extra Key.
Modifier layers
<modmap> remaps one key value to another while a keyboard modifier is active. Supported mapping tags are <fn>, <shift>, and <ctrl>; a is the original value and b is the mapped value.
<modmap>
  <fn a="q" b="f1"/>
  <fn a="w" b="f2"/>
  <fn a="a" b="esc"/>
  <fn a="s" b="tab"/>
  <fn a="n" b="^C:ctrl,c"/>
  <fn a="m" b="^D:ctrl,d"/>
</modmap>
The shipped layout maps Fn+Q … Fn+P to F1 … F10, Fn+Z/X to F11/F12, navigation across the home row, and Fn+N/M to Ctrl+C/D.
Key values
Values may be literal Unicode text, named keyboard keys such as esc, tab, enter, backspace, delete, home, page_up, left, or f1, keyboard modifiers such as ctrl, alt, shift, and fn, built-in gestures such as cursor_left, or tool: launcher actions.
XML-reserved characters must be escaped: write &, <, >, and ". The shipped example also demonstrates escaped keyboard parser values such as \?, \#, \@, and \\.
Safe editing and limits
- Maximum file size: 512 KiB.
- Maximum rows: 16.
- Maximum keys per row: 32.
- Maximum total keys: 512.
- Only one
<modmap>is allowed. - Save atomically when possible: write a temporary file beside
layout.xml, then rename it. - Run
termux-reload-settingsafter every edit; no app restart is required.
When debugging, begin with the shipped example and make one change at a time. The command palette lists action IDs, while Key inspector shows the key event and terminal bytes produced by ordinary keyboard values.
DOCUMENTATION
Extra Keys recipes
Termux Extra Keys are the configurable rows in the terminal dock. They are separate from the full embedded keyboard defined by ~/.termux/keyboard/layout.xml.
Visual editor
Open Settings → Keyboard → Edit extra keys, or run the extrakeys.edit launcher action. The visual editor supports multiple pages, tap-to-edit keys, hold-and-drag reordering, macros, swipe-up actions and a glyph picker. It writes the same Extra Keys configuration described below, so you can start visually and keep hand-editing later.
src: assets/showcase/features/extra-keys-editor
title: Extra keys editor
caption: Editing tap and swipe-up actions, choosing a glyph, then adding another page and row.
Edit the file directly
Configure the rows in ~/.termux/termux.properties, then apply changes with:
termux-reload-settings
Item schema
extra-keys is a matrix: the outer array contains rows and each inner array contains buttons.
extra-keys = [[ESC, TAB, CTRL, ALT, LEFT, DOWN, UP, RIGHT]]
A button can be a simple key name or an object:
| Field | Value | Meaning |
|---|---|---|
key |
One key/action string | Run one key, built-in Extra Key command, or tool: launcher action |
macro |
Space-separated key sequence | Send several classic terminal keys in order |
display |
Text or glyph | Override the label shown on the button |
popup |
Simple key or another item object | Secondary action selected by swiping upward |
An item must contain either key or macro, never both. popup supports the same key, macro, and display structure.
extra-keys = [[ \
  {key: ESC, popup: {macro: "CTRL f d", display: "tmux exit"}}, \
  {macro: "ALT j", display: "A-j", popup: {macro: "ALT g", display: "A-g"}}, \
  {key: KEYBOARD, popup: PASTE} \
]]
Launcher action syntax
Use a key item—not macro—to run a registry action:
tool:<action-id>
tool:<action-id>:name=value,name=value
Unlike keyboard/layout.xml, Extra Keys can carry named action arguments after the second colon.
extra-keys = [[ \
  {key: "tool:app.command_palette", display: "⌘"}, \
  {key: "tool:workspace.picker", display: "▤"}, \
  {key: "tool:workspace.save_prompt", display: "⛁"}, \
  {key: "tool:terminal.toggle_scratchpad", display: "▣"} \
]]
Multiplexer control row
This row combines pane creation, focus, layouts, floating panes, and window navigation. Swipe upward on buttons with a popup to run the secondary action.
extra-keys = [[ \
  {key: "tool:pane.split_vertical", display: "⇳", popup: {key: "tool:pane.split_horizontal", display: "⇔"}}, \
  {key: "tool:pane.focus_direction:direction=left", display: "←", popup: {key: "tool:pane.move_to_edge:edge=left", display: "⇤"}}, \
  {key: "tool:pane.focus_direction:direction=down", display: "↓"}, \
  {key: "tool:pane.focus_direction:direction=up", display: "↑", popup: {key: "tool:pane.next_layout", display: "⟳"}}, \
  {key: "tool:pane.focus_direction:direction=right", display: "→", popup: {key: "tool:pane.move_to_edge:edge=right", display: "⇥"}}, \
  {key: "tool:window.previous", display: "◧"}, \
  {key: "tool:window.next", display: "◨"}, \
  {key: "tool:pane.toggle_float", display: "◈", popup: {key: "tool:pane.equalize", display: "="}} \
]]
Pane and window actions are unavailable while single-pane compatibility mode is enabled.
App and session shortcuts
Extra Keys can launch apps because they can supply the required query argument:
extra-keys = [[ \
  {key: "tool:app.launch:query=com.whatsapp", display: "WA"}, \
  {key: "tool:app.launch:query=YouTube", display: "YT"}, \
  {key: "tool:session.new:name=build,failsafe=false", display: "+build"}, \
  {key: "tool:session.browser", display: "sessions"}, \
  {key: "tool:session.previous", display: "↰"}, \
  {key: "tool:session.next", display: "↳"} \
]]
For values containing punctuation or spaces, prefer a package name or stable app ID. The Extra Key argument parser trims names and values and separates multiple arguments with commas; it does not provide a second quoting layer inside the tool: string.
Two-row example
extra-keys = [ \
  [ \
    {key: KEYBOARD, popup: PASTE}, \
    {key: "tool:app.command_palette", display: "⌘"}, \
    {key: "tool:terminal.search_scrollback", display: "⌕"}, \
    {key: "tool:terminal.hints", display: "?"}, \
    {key: "tool:workspace.picker", display: "▤"}, \
    {key: "tool:terminal.toggle_scratchpad", display: "▣"} \
  ], \
  [ \
    ESC, TAB, CTRL, ALT, \
    {key: LEFT, popup: HOME}, \
    {key: DOWN, popup: PGDN}, \
    {key: UP, popup: PGUP}, \
    {key: RIGHT, popup: END} \
  ] \
]
Classic terminal and tmux macros
Use macro when you want to send ordinary terminal keystrokes instead of invoking a launcher action:
extra-keys = [[ \
  {key: ESC, popup: {macro: "CTRL b d", display: "tmux detach"}}, \
  {macro: "CTRL b c", display: "tmux +win"}, \
  {macro: "CTRL b p", display: "tmux prev"}, \
  {macro: "CTRL b n", display: "tmux next"}, \
  {macro: "CTRL c", display: "^C"}, \
  {macro: "CTRL d", display: "^D"} \
]]
These macros target a shell program such as tmux. They are unrelated to the launcher’s in-app multiplexer actions such as pane.split_vertical and window.next.
Choosing the right surface
| Goal | Best configuration |
|---|---|
| Physical keyboard shortcut or multi-stroke chord | termux-launcher-bindings.conf |
| Modal leader keymap | termux-launcher-bindings.conf |
| Full embedded keyboard layout or swipe direction | keyboard/layout.xml |
| Visible dock button with a swipe-up secondary | extra-keys in termux.properties |
| Run an action requiring arguments from a touch button | extra-keys in termux.properties |
| Send a shell/tmux key sequence | Extra Keys macro, or binding-file send-key / send-text |
The older shortcut.create-session, shortcut.next-session, shortcut.previous-session, and shortcut.rename-session properties still exist, but the launcher binding file is the flexible path for new shortcuts, conditions, chords, and registry actions.
If a tool: Extra Key does nothing, confirm the action ID and argument names in Action reference, check whether split panes or a terminal selection is required, and inspect the app log. Tool failures are intentionally logged rather than shown as repeated toast messages.
DOCUMENTATION
Backup & recovery
Updating is just installing the new APK over the old one - same edition, same source. Android refusing a mismatched signature is protection, not a bug; never uninstall to “fix” an update without backing up first - uninstalling deletes your entire Termux home.
What to back up
Project files, dotfiles, and ~/.termux (themes, fonts config, keybinds, saved workspaces). Caches and downloaded AI models are not worth it - they re-download.
cd ~
tar --exclude='./storage' --exclude='./.cache' -czf ~/storage/downloads/termux-home-backup.tgz .
Note: this writes to shared Downloads - check for secrets (SSH keys, tokens,
~/.launcherctl/token) before copying the archive off the phone. On the Nix edition, your flake in~/.config/nix-on-droidreplaces the package manifest - back it up and the environment is reproducible.
Recovering on a fresh install: get a working shell first, restore projects and keys (with correct permissions), reinstall packages (or nix-on-droid switch), restore dotfiles, workspaces last - and review captured workspace commands before running them.
Common fixes
The APK won’t install/update. Package name or signature mismatch - you’re mixing editions or sources. Get the matching build from Releases. The standard edition (com.termux) conflicts with Termux from F-Droid/GitHub; use the Nix edition if you want both.
Home button opens another launcher. Android Settings > Apps > Default apps > Home app. If the choice keeps resetting, clear defaults on the old launcher.
CPU card shows stale or basic data. The unprivileged /proc fallback is unavailable or Shizuku is not connected. Start its service and reconnect from Settings > Services & permissions > Shizuku for detailed per-core and process data. Wireless-debugging starts need reconnecting after every reboot. See Permissions.
A workspace didn’t bring my program back. Workspaces replay commands, they don’t resume processes - unsaved buffers and remote logins are gone. Save durable state in files.
Touch/keyboard acts weird in a TUI. The app probably enabled mouse reporting or an alternate screen - exit it and test in a clean shell. For hardware key weirdness, check for binding collisions with the Key inspector (Keybindings).
Android kills my background jobs. Aggressive battery management. Use termux-services, the wakelock action on the session notification, and narrow battery exemptions - not hope.
Security notes
Your Termux home concentrates capability: source code, SSH keys, tokens, shell history, the TAI token, possibly ADB-level Shizuku access. The boundaries that matter;
- Keys and tokens stay in private home storage - never in shared Downloads, screenshots, or public dotfiles.
- Read scripts before piping them into a shell - including this project’s setup scripts. Multiline clipboard content can execute more than it looks like when pasted; inspect unfamiliar text in an editor first.
- Workspaces with captured commands, keybind files, and extra-key configs are executable config. Review anything imported before it runs.
- Keep the TAI endpoint on loopback unless you’ve deliberately set up auth for a network listener. Protect
~/.launcherctl/tokenlike an API key. - Install APKs only from the project’s releases, grant Shizuku only to the package you intended, and treat
rishcommands as ADB-privileged.